This beaded flower is made up of 5 petals as you can see from the picture. Each of the petals is made up of two parts;
1. An ascending part, with 6 peaks
2. A descending part also with 6 peaks
If you want the flower to be smaller, you can reduce the number of the peaks. For example, the flower below has just 3 ascending and 3 descending peaks.
The last descending peak of one petal is also the ascending peak of the next petal.
It is not too difficult once you follow the instructions patiently.
Let's get started:)
Materials
1. 12/o or 11/o seed beads
2. 0.25mm 0.3mm monofilament beading thread.
3. A beading needle
4. A big bead or bead ball
Procedure
1. Cut a long length of thread and add a stop bead at one end
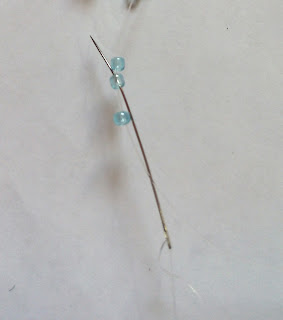
4. Lower 3 bead turn: Pick up 3 beads and pass needle through the 2nd bead.
5. Pick up 3 beads and pass through the center bead of the previous net. i.e the 2nd of the 3 beads added in step 3.

6. Upper 7 beads increase: Pick up 7 beads and pass needle through the 2nd bead from the end.


7. Pick up 3 beads , skip 3 beads and pass through the 4th bead.

8. Pick another 3 beads and pass through the middle bead of the next net

10. make 2 nets

11. Repeat step 5: Upper 7 beads increase: Pick up 7 beads and pass needle through the 2nd bead from the end.

6 peaks Like this:
13. To start the descending part, do lower 3 beads turn: i.e pick up 3 beads and pass needle through the 2nd bead.
13. bead 5 nets(instead of 6)
Till you have something like this :
14. Don't build another net on the last peak but rather just pick up 3 beads and pass needle through the 2nd bead (as you did with the lower 3- bead turn).
15. Do netting for the rest of the row
17. Continue to decrease in this way i.e Lower 3 bead turn, then 4nets, Lower 3 bead turn, then 3 nets, Lower 3 bead turn, then 2 nets, Lower 3 bead turn, then 1 net till you get this (you should have 5 descending peaks)
The first petal is complete!
17. Now, this last descending peak will be the 1st ascending peak for the next petal. So you will simply just start all over from step 6 all the way to step 16.
18. Repeat step 17 three more times till you have a total of 5 beaded petals.
By the time you've done two or three beaded petals, the rest will be so easy, you will be able to bead them without looking at the tutorial.
The five petals completed.
Forming the petals into a closed circle.
The last peak
19. Pick another 3 beads and pass the the next middle bead.
20. Now the tricky part : Bring the 1st petal and the last petal together, making sure they are not twisted.
21. Pick up 1 bead and pass through the middle bead of the first set of nets (done in step 5.)
22. Pick up another bead and pass through the middle bead(with the red mark) of the last net done
23.Pick 3 beads and do the last lower 3 beads turn
24. Pick up 1 bead and pass through the 1st net done in stage 5. Pull snugly.
Weave your thread through your work, tie and cut
.
25. Thread a new length of thread and pass through every other lower picot.
When you have pass the thread round all, pull as tight as best as you can making sure those beads left are on one side. Weave through the project, tie return back to the bottom.
26. Again, pass the thread through those left over beads. Pull as tightly as you can. Reinforce by going through the 2 circles again.
Pass your needle back into your work, make several knots and cut.
For the last part, you can use a large bead to cover the hole or use any other method. For this particular one, I made half of 30 beads beaded ball using 6mm rondelle crystals (stopping at the 2nd round).I then attached it to the last beads of the circle. and that is it.
I hope you are able to follow the tutorial. It may seems complex, but it is actually very straightforward. If any of the steps is not clear, please let me know in the comment section below.
Happy beading:)


Thanks for the well explained tutorial. I've the pattern but struggled a bit to finish one of the flowers but this is more helpful.Thanks
ReplyDeleteI am glad this was helpful. :)
ReplyDeleteThis comment has been removed by the author.
ReplyDeleteThis comment has been removed by the author.
ReplyDeleteThis comment has been removed by a blog administrator.
ReplyDeleteWow!!!! I was planning to look for where I will learn this flower bead. Thanks a lot.
ReplyDeleteYou are most welcomed.
DeleteThis is amazing, with your steps I made mine and it was so simple...Thanks for this tutorial
ReplyDeleteLove your blog.just found it today
ReplyDeleteGreat work, weldone the 👍
ReplyDeleteGreat work, weldone the 👍
ReplyDeleteThis is lovely, would do mine asap. Thanks
ReplyDeleteThis is lovely, would do mine asap. Thanks
ReplyDeleteThank you so much for this have wanted so long to find how to do it.
ReplyDeleteNice preparation procedure sharing through your blog about beaded flower.
ReplyDeletediamond necklace designs