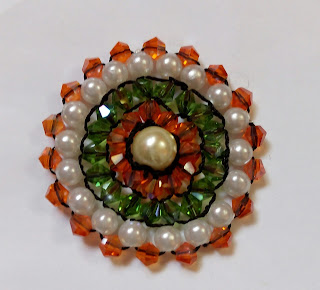
 |
| Circular brick stitch |
Materials that I used in this tutorial:
4mm orange bicone beads
4mm green bicone beads
one 8mm pearl
4mm pearl beads
Needle
Thread (nymo or monofilament). Use clear thread. I used black thread because of the tutorial.
Procedure
1. Pass your thread through the 8mm pearl two times and push it to one side. Pass the thread through the pearl two more times (making a total of four times). Push the two to the opposite side like this:
2. Pick two orange bicone beads and pass the needle under the threads that were wrapped around the 8mm pearl bead:
3. Pass the needle from bottom to top of the second bicone bead,
such that the thread is coming out from the top of the bicone . Use your hand to align the beads so they lay flat besides each other.
4. Now pick one bicone bead(3rd bicone) and pass your needle under the thread near the first two beads and repeat step three again:
5. Repeat step 4 till you have reached the first bicone bead added.
N.B: when you get to the end of the 1st half of the 8mm bead, after picking a bicone bead, just pass your needle under the thread on the other half and continue repeating step 4
6. When you get to the last bead, connect this last bicone bead with the first added bicone by passing your needle down, from top to bottom through the first bead and up, from bottom to top of the last added bead.


8. Pass the needle from bottom to top of the second bicone bead, such that the thread is coming out from the top of the bicone . Use your hand to align the beads besides each other.
9. Pick one bicone, pass needle under the thread between wo bicnes and come up through the newly added bicone,just as we did for the first layer.
10. Repeat step 9 until you complete the whole round. You may need to pass two bicones through a single space once in a while to ensure your work is very flat:
11. Join the last bead with the first bead like we did in step 6
12. To add the picot edges, pick up one 4mm pearl, 1 bicone and another 4mm pearl ( so here, we are picking 3 beads instead of the regular two for starting a new brick stitch layer). Pass your needle through the thread brigde like we did for the previous layers.
13. Pass the needle up through the second pearl and pull tight.
14. Next, pick up 1 bicone bead and 1 crystal bead, pass your needle through the thread between the first 2 beads on the 2nd layer and up the newly added pearl bead.
15. Repeat step 13 until you get to the last bead like this:
16. Now pick a single bicone.
17. Pass the needle through the first pearl bead on the layer
18. Pull tight, pass your needle back up through the last pearl. Pass the thread back through some beads, tie knots and cut off.
Happy beading:)


Nice tutorial
ReplyDeleteI like all your collection.
ReplyDeletediamond jewellery in coimbatore